How To Tile The Kitchen Wall
Tiling a kitchen wall is a DIY project that can be carried out by almost anyone. Not only does it refresh your space, but tiles also serve a functional purpose as they protect your kitchen wall from everyday splashes and stains that can occur when cooking.
Whether you’re tiling a small area or an entire wall, we’ve put together this helpful guide to walk you through every step to help your kitchen achieve a professional look.
Read on for more information…

Benefits of tiling a kitchen wall
Tiles have been a popular choice in British kitchens for many years, and for good reason. As well as their attractive appearance, they offer a wide range of great benefits, including:
- Durability: Tiles are extremely hard-wearing and naturally resistant to moisture and grease, which makes them ideal for cooking spaces.
- Easy to clean: Unlike painted or wallpapered walls, tiles are very easy to clean. Any dirt or grime can just be wiped away in seconds. This makes them perfect for areas around sinks and cookers.
- Variety of styles: From classic designs to more contemporary styles, tiles are extremely versatile and come in endless colours, shapes and finishes. This means there will be something to suit any kitchen.
- Increased home value: A well-tiled kitchen can even enhance your property’s appeal and make it more attractive to buyers.
- Protection: Tiles create a waterproof barrier that helps protect walls from damage caused by steam or splashes.
How to tile the kitchen wall
Let’s take a closer look at how to properly tile your kitchen wall.
Gather your equipment
Before you start, make sure you’ve got all the tools and materials you’ll need for the job. Being organised will save time and stop mistakes from happening later on. You will need:
- A bucket
- A drill
- Tape measure
- Permanent marker
- Trowel
- Grout float
- Sponge
- Tile cutter
- Roller and tray
- Tile saw
- Silicone
- Silicone gun
- Tiles
- Adhesive
- Grout
- Surface primer
- Tile edging
Prepare the space
Proper preparation is crucial for achieving a smooth and professional finish. Start by turning off all electric sockets in the vicinity. Make sure you clean the wall thoroughly, removing all grease and dust. If the surface is uneven, fill the holes or cracks and let them dry properly before continuing.
Next, mark out the area you plan to tile. Measure the height and width of the section you’ll be tiling. It’s also a good idea to lay a dust sheet over the worktops and floors to protect them from debris.
Choose where to start
A key step for the whole project is choosing the right place to start. You’ll want to begin tiling in a highly visible area, usually near a large appliance, like your oven is the best choice. This will ensure the layout looks balanced.
Use a spirit level and pencil to mark a horizontal line at the height of your first row of tiles. Make sure you fix a wooden batten along this line; this will help ensure you keep everything perfectly straight.
Apply the adhesive
Using a notched trowel, spread the tile adhesive evenly over a small section of the wall. Do no more than one square metre at a time to make sure the adhesive does not dry out. Hold the trowel at a 45-degree angle to create ridges, which will help the tiles stick to the surface more securely.
Be sure to use the correct adhesive for your tiles and wall type. Different tiles need different adhesives, so make sure you check this first.
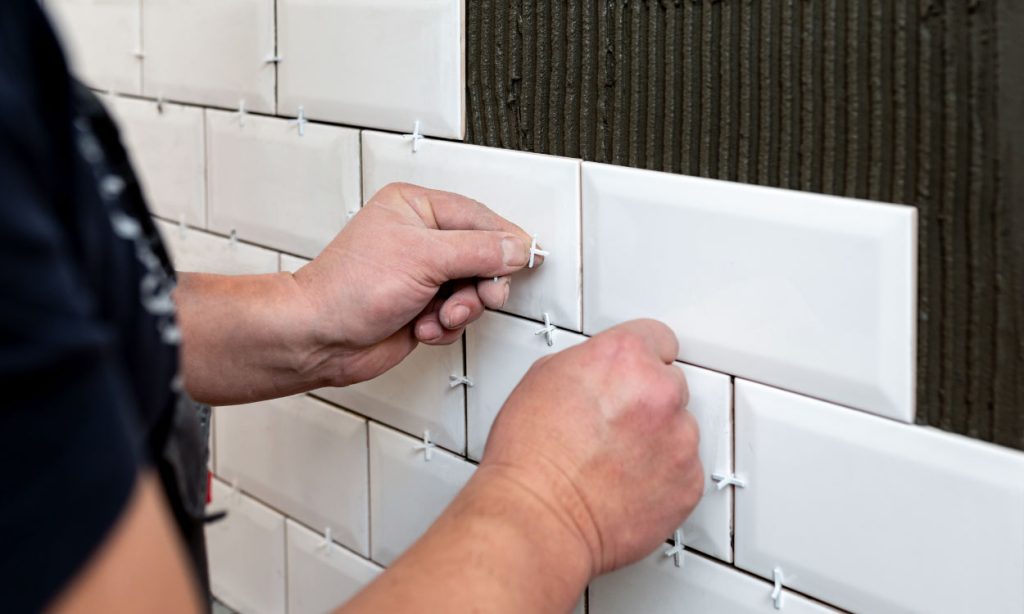
Add tiles
Press each tile gently but firmly into the adhesive, twisting slightly as you go to make sure air bubbles are removed. Insert tile spaces between each tile to keep the gaps even. Use your batten to check that every row is level. If a tile slips, don’t panic – simply adjust it quickly before the adhesive sets.
Continue tiling in small sections, working your way from the centre outwards. Wipe away any excess adhesive with a damp sponge before it dries out.
Cut tiles
When you reach the edges or corners of the wall, you will likely need to cut some tiles to make sure they fit. Measure the gap carefully, mark it with a pencil and cut it to shape using a tile cutter. For tougher materials or awkward shapes, an electric tile saw may be needed to ensure precision.
Work around sockets
Tiling around electric sockets can be fiddly, but patience pays off. Turn off the power at the fuse box before removing the socket covers. Measure and mark where the socket will sit on your tile, then carefully cut out the section using a tile saw or nippers. Tiles should fit snugly around the socket without leaving gaps.
Grout tiles
Once your tiles are in place, allow the adhesive to dry for at least 24 hours before applying grout. Rushing this stage can cause tiles to shift or grout to crack later on.
Mix your grout according to the packet instructions, then use a grout float to press it firmly into the gaps. Work diagonally across the tiles to fill the joints evenly. After about 15 minutes, wipe off the excess grout with a damp sponge. Once the grout has fully dried, polish the tiles with a soft cloth.
Finish the edges
To complete your project, add some tile trim around the exposed edges. This will give your tiling a neat, professional look and protect the corners from chipping. Seal along the edges and around sockets with a thin line of silicone sealant to keep moisture out.
Common mistakes when tiling a kitchen
Some common mistakes to avoid when tiling a kitchen include:
- Not preparing the area – Dusty or greasy walls can cause the tiles to fall off.
- Skipping battens – Battens keep the tiles level, and not using them can cause rows to slope.
- Grouting too soon – Adhesive needs at least 24 hours to dry properly.
- Using the wrong adhesive – Not all adhesives suit every tile or surface, so make sure you check first.
The post How To Tile The Kitchen Wall appeared first on UK Home Improvement.