All About Front Entry Lighting

Well-designed entry lighting is bright enough to keep you and your family safe while also complementing your home’s architecture. With careful planning, you can select the perfect front entry lighting to put your home’s best face forward.
This guide describes the different types of front entry lighting, providing tips for selecting an option that best matches the architecture of your house and personal style.
Front Porch Light Diagram
Types of Front Entry Light Fixtures
There are three common front entry light fixtures: wall mount, ceiling mount, and pendant. Each is described in detail below.
Wall-Mount Fixtures
Wall-mounted fixtures, such as sconces, can be installed on either side of the door or as a single fixture on the doorknob side. These fixtures provide focused illumination and can complement various architectural styles.
Ceiling-Mount Fixtures
Ceiling-mounted fixtures, including flush mounts and semi-flush mounts, are ideal for entries with low ceilings or those exposed to wet weather. These fixtures can provide ample illumination while maintaining a low profile.
Pendant Lights
Pendant lights are hanging fixtures that work well in entries with high ceilings. They can make a dramatic statement and provide excellent illumination. However, pendants may not be suitable for windy areas.
Size and Placement of Front Entry Lights
Proper sizing and positioning ensure that your lighting complements your home’s architecture while providing adequate light for safety and navigation.
Calculating Fixture Size
To determine the right size for your front entry light fixture, consider the dimensions of your entryway and the scale of your home. It is common to choose a light fixture either one-third or one-fourth the size of your door height.
Optimal Placement Guidelines
Proper exterior placement of lighting fixtures is essential for a well-lit front entry. Install wall-mounted fixtures at eye level, typically between 65 and 75 inches from the ground to the center of the fixture. If you’re using a single sconce, place it on the doorknob side of the door for a well-lit view when greeting guests.
For ceiling-mounted fixtures, leave at least 7 feet of clearance from the bottom of the fixture to the ground. Hang pendant lights high enough to provide clearance for tall visitors while casting adequate light on the entry area.
Double Sconces
Door-framing lights are a natural choice for symmetrical entries, and typically placed 6 to 12 inches from the door casing. A 13- to 15-watt LED bulb per fixture is usually enough.
Single Sconce
When space is limited and there’s no surface overhead, one fixture can suffice. Hang it on the doorknob side for a well-lit view when greeting guests.
Flush-Mount
This is an ideal solution for entries with low ceilings, screen or storm doors, and porches open to wet weather. Use a 23- to 40-watt LED bulb or multiple bulbs with the same total wattage.
Pendant
A hanging fixture lights a high-ceilinged entry, but not where it’s windy. With opaque glass, use a single 23- to 40-watt LED bulb; for clear glass, use several smaller bulbs with the same combined wattage.
Front Entry Lighting Fixture Styles
There are a multitude of fixture styles to help you find the perfect match to complement your home’s design. Described below are some popular style categories to consider.
Traditional Styles
Traditional fixtures can include lantern-style sconces, colonial onion lights, or Victorian-inspired designs. A Federal-style home might benefit from elegant lantern-style sconces with hinged glass doors and candle-covered sockets. Colonial homes often pair well with copper onion lanterns, which offer rustic charm and durability for seaside living.
Cottage
For simple exteriors, opt for quaint details, such as lantern arms that curlicue or panes of vintage-look opaque glass that emit a soft glow.
Tudor Revival
A house with arched windows, stonework, or a steeply pitched roof calls for medieval-inspired lighting, often featuring hammered metals and seeded glass.
Colonial
Unadorned houses of the era, such as saltboxes and Cape Cods, were often lit by copper onion lanterns, durable enough for seaside living. Today, reproductions lend the same rustic charm.
Victorian-Era
Lights with enthusiastic embellishments match the romantic hallmarks—like gingerbread trim and fancy shingling—typical of Queen Annes.
Federal
An elaborate, elegant entrance will benefit from lantern-style sconces. Hinged glass doors and candle-covered sockets lend an air of authenticity.
Modern and Contemporary Options
For homes with clean lines and minimalist aesthetics, modern and contemporary lighting fixtures provide a sleek, sophisticated look. These styles often feature simple geometric shapes, streamlined silhouettes, and materials like brushed nickel or matte black finishes.
Arts and Crafts
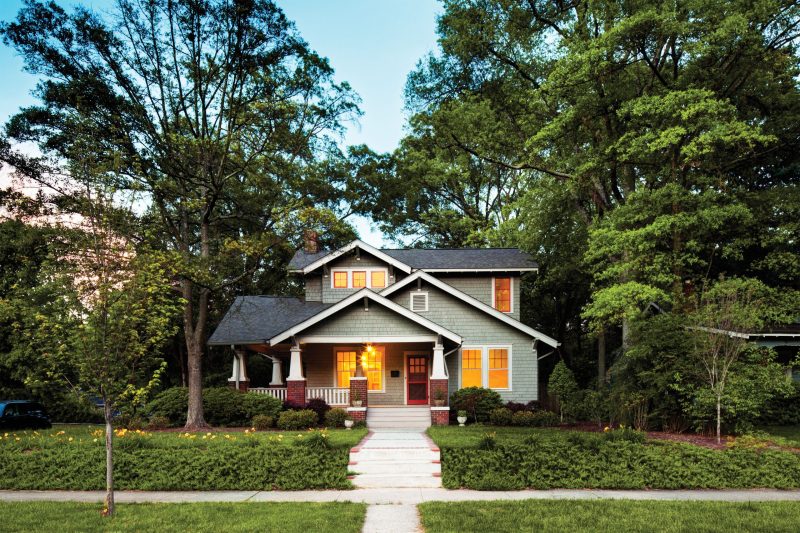
Fixtures with angular profiles and ogee edges are a good fit for a bungalow and other clean-lined early 20th century styles.
Ranch
While traditional-style lights are often used on mid-century homes, linear, almost aerodynamic silhouettes and burnished or powder-coated metals are also true to the period.
Transitional Designs
Transitional lighting styles bridge the gap between traditional and modern, offering a versatile option that can complement a wide range of home designs. These fixtures often combine classic forms with updated finishes or materials, creating a timeless yet fresh appearance. Transitional styles can be a great choice for homeowners looking to update their entry lighting without committing to a strictly modern or traditional style.
Colonial Revival
Detailed fixtures clad in gilded metal or glossy black stand up to the formal entrances of homes with symmetrical facades and columned porticoes.
Classical
Sculptural and statement-making, these globes work well on the commanding facade of an urban rowhouse or a double-height porch.
Materials and Finishes
The materials and finishes of your front entry lighting play a crucial role in appearance and longevity. Choosing durable materials that can withstand the elements is essential for maintaining the functionality of your fixtures over time.
Polished Brass
Known for its durability and classic appearance, brass can develop a beautiful patina over time. Look for solid brass fixtures for the best quality and longevity.
Polished brass is sold lacquered to prevent tarnish or unlacquered to patinate. Lacquer must be reapplied every few years. Unlacquered brass will darken to brown.
Works with: Formal traditional styles
Aged Brass
Aged brass is often sprayed or plated over another base metal, then polished to add highlights. For durability, look for solid brass that’s aged chemically and tooled for smooth edges.
Works with: Any traditional style
Oil-Rubbed Bronze
This metal can be sprayed or plated over another base metal, but top-quality lights use a chemical process on solid brass that alters the metal’s surface.
Works with: Most any style of home
Polished Nickel
Polished nickel is generally placed over another base metal, and may have a clear coat for added protection. Quality lights are plated over rustproof brass.
Works with: Coastal and contemporary homes
Matte Black Finish
Like all colored finishes, matte or glossy, matte black finish is often sprayed on. For better durability, though, look for powder coating, in which the base metal (typically aluminum) is covered with a dry powder that is cured with heat.
Works for: Providing contrast and color
Copper
Copper offers excellent durability and develops a distinctive green patina as it ages. Copper fixtures are particularly well-suited for coastal environments thanks to their corrosion resistance.
Copper can be sprayed or plated over another base metal, but the best lights are made from solid copper. A clear coat can be added to slow oxidation, but copper is usually left to patinate naturally.
Works for: Adding a time-honored look
Glass and Shade Varieties
There are also a number of different types of light fixture glass or shades that protect the bulb from the elements while adding a decorative flourish. Here are a few of the most common.
- Clear glass: Provides maximum light output and works well with decorative bulbs.
- Frosted or seeded glass: Diffuses light for a softer glow and can hide dust or insects that may accumulate inside the fixture.
- Colored or stained glass: Adds a decorative element and can create interesting light patterns.
- Metal shades: Offer durability and can direct light downward for focused illumination.
Functionality and Features of Front Entry Lighting
When selecting front entry lighting, here are a few functions and features to keep in mind.
Brightness
Lumens, rather than watts, are the most accurate measure of brightness for modern LED bulbs. For a typical front entry, aim for fixtures that provide between 600 and 1600 lumens in total. This range offers enough light to illuminate the area effectively without creating harsh glare. Remember that you can always install dimmer switches to adjust the brightness as needed.
Motion Sensors and Smart Technology
Motion-activated lights automatically illuminate when someone approaches, deterring potential intruders and providing a welcoming glow for guests. Smart lighting systems allow you to control your entry lights remotely via smartphone apps, set schedules, and even integrate with other home automation features. These technologies can improve energy efficiency by ensuring lights are only on when needed.
Energy Efficiency Considerations
LED bulbs are the most energy-efficient option available, using up to 75% less energy than traditional incandescent bulbs and lasting much longer. Look for ENERGY STAR certified fixtures and bulbs, which meet strict energy efficiency guidelines set by the U. S. Environmental Protection Agency and the U. S. Department of Energy.
Wet vs. Damp Location Fixtures
The difference between wet and damp location fixtures is their construction. Wet-rated fixtures use combinations of drain holes, seals, and protective gaskets to prevent water from entering the electrical components. Damp-rated fixtures are designed to resist moisture but are not sealed against direct water exposure.
When choosing between wet and damp-rated fixtures, consider the level of exposure your entry lighting will face. If your front door is fully exposed to the elements, opt for wet-rated fixtures. For covered porches or protected entryways, damp-rated fixtures may be sufficient. It’s always better to err on the side of caution and choose a wet-rated fixture if you’re unsure about the exposure level.
Understanding UL Ratings for Wet and Damp
Underwriters Laboratories (UL) is an independent safety certification organization that rates lighting fixtures for different environments. When selecting outdoor lighting, two UL ratings are relevant:
- UL Damp-Rated: Suitable for sheltered porch areas that are protected from water—even during storms—and from excessive moisture, such as salt air. These fixtures can withstand humidity but should not be directly exposed to water.
- UL Wet-Rated: Necessary around doors fully open to the elements, where rain, snow, and heavy fog or salt air can come into direct contact with the fixture. Wet-rated fixtures are designed to prevent water from accumulating on live wires and other electrical parts.
Always check the UL rating of a fixture before purchasing to ensure it’s appropriate for your specific entry location.
DIY vs. Professional Installation of Front Entry Lighting
Installing front entry lighting can be a rewarding do-it-yourself (DIY) project, but it’s important to assess your skills and the installation’s complexity before deciding whether to tackle it yourself or hire a professional.
Tools and Skills Needed to Install Exterior Lighting
For basic exterior light fixture replacement, you’ll typically need the following tools:
- Screwdriver set
- Wire strippers
- Electrical tape
- Voltage tester
- Ladder
- Pliers
Basic electrical knowledge is essential, including understanding how to safely turn off power at the circuit breaker and how to connect wires properly. You should also be comfortable working at heights if installing ceiling-mounted fixtures.
When To Call an Electrician
While changing a light fixture is often a simple job, there are situations where it’s best to call a professional electrician:
- Installing a new junction box for a fixture where one didn’t exist before
- Upgrading your electrical system to accommodate new lighting
- Adding dimmer switches or smart home integration
- Working with aluminum wiring (common in homes built between 1965 and 1973)
- If you’re unsure about any aspect of the installation process
Remember, electrical work can be dangerous if not done correctly. If you have any doubts about your ability to safely complete the installation, it’s always better to hire a licensed electrician. This ensures the job is done safely and up to code, potentially saving you from costly repairs or safety hazards down the line.
Maintenance and Care for Front Entry Lights
Proper maintenance of your front entry lighting ensures its longevity. Regular care can prevent issues and maintain the fixture’s appearance and functionality.
Cleaning Tips
Take these steps to keep your front entry lights in top condition:
- Clean fixtures regularly with a soft, damp cloth to remove dust and debris.
- For tougher grime, use a mild soap solution, avoiding harsh chemicals that could damage the finish.
- Clean glass components with a glass cleaner, ensuring all residue is wiped away to prevent spotting.
- For metal finishes, apply a thin coat of car wax annually to protect against oxidation and maintain shine.
Replacing Bulbs and Parts
When it’s time to replace bulbs or parts, do the following:
- Always turn off the power at the circuit breaker before working on the fixture.
- Choose a bulb of the correct type and wattage as specified by the manufacturer.
- Check for any signs of wear or damage when changing bulbs, such as cracked sockets or frayed wires.
- If you notice any issues beyond simple bulb replacement, consult a professional electrician.
Front Entry Lighting Cost
While there are front entry lighting options for every price point, investing in quality fixtures can lead to better longevity and performance in the long run.
Entry-level fixtures typically cost $50–$150. These are often made of less expensive materials like steel sheet metal with sprayed-on finishes. While they can provide adequate lighting, they may not withstand harsh weather conditions as well as higher-end options.
Midrange fixtures, priced between $150 and $250, often feature more durable materials like aluminum with powder-coated finishes. These fixtures generally offer better weather resistance and may include decorative elements like beveled or seeded glass.
High-end fixtures, priced at $250 and up, are typically made from premium materials such as solid brass or copper. These fixtures often feature intricate designs, hand-applied finishes, and superior craftsmanship. While more expensive upfront, they can last for decades with proper care.
When budgeting, consider additional costs such as installation (if hiring a professional), any necessary electrical upgrades, and ongoing maintenance. Energy-efficient LED bulbs may have a higher initial cost but can lead to significant savings on energy bills over time.
Our Conclusion
Front entry lighting can create a welcoming home exterior that balances visual appeal, functionality, and safety. Carefully consider factors such as fixture type, style, size, and placement to select lighting that enhances your home’s architectural features. Remember to choose durable materials and finishes appropriate for your climate, and always prioritize safety with proper UL ratings for outdoor use.


